After having to reinstall my repaired radio, I discovered that my 12 V receptacle was very fragile. Like a lot of stuff made nowadays, it's meant to be sold but not used. Up till then, the mounting seemed to be sturdy enough for normal use.
I noticed, while looking for a replacement 12 V receptacle, that very few have mounting options. Most expect you to leave it loose in your car and some offer some 2-sided tape to stick it to a flat surface. None appear to have an option to permanently mount your 12 V outlets neatly

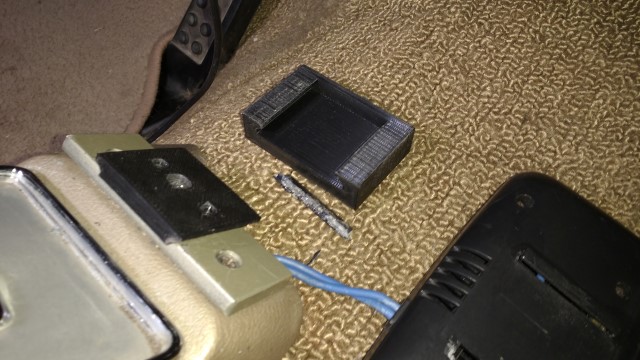
My old twin-shaft AM radio is removed and replaced from behind the dashboard and this area is already a bit congested with my aftermarket instrumentation and 12 V receptacle. While maneuvering it back into position, I inadvertently put a bit too much pressure on the receptacle and caused one of the receptacle's shoe receiver guides to break off.
My first attempt at repair was to use modeling cement to glue the broken piece back onto the receptacle's body. Modeling cement contains solvents that "weld" the polystyrene and ABS plastic parts of a model together, which I thought would be my best option. Unfortunately, the receptacle was not made of either polystyrene or ABS plastic because the glue did not hold in the slightest and peeled away from the surface. At least that made it easy to clean up for the epoxy.

While mulling over my options of what I was going to do next, I noticed that the Fort Erie Public Library had a 3D printer so I occurred to me that I could make a repair adapter that I could epoxy onto the broken receptacle. This part would then mate up with the unbroken shoe still attached to the car.
While I'm reasonably proficient with 2D AutoCAD and took a 3D AutoCAD course at Niagara College several years ago, I don't have access to the College's software. Luckily, there are some free 3D design options available. One option is to use Autodesk's free online 3D software: Tinkercad. Another is to use FreeCAD. Having spent some with online tutorials for each and tried drawing some 3D designs, I ended up using FreeCAD. In either case, you need to send a wire-frame version of your design to the library, where they will print it for you on one their 3D printers.
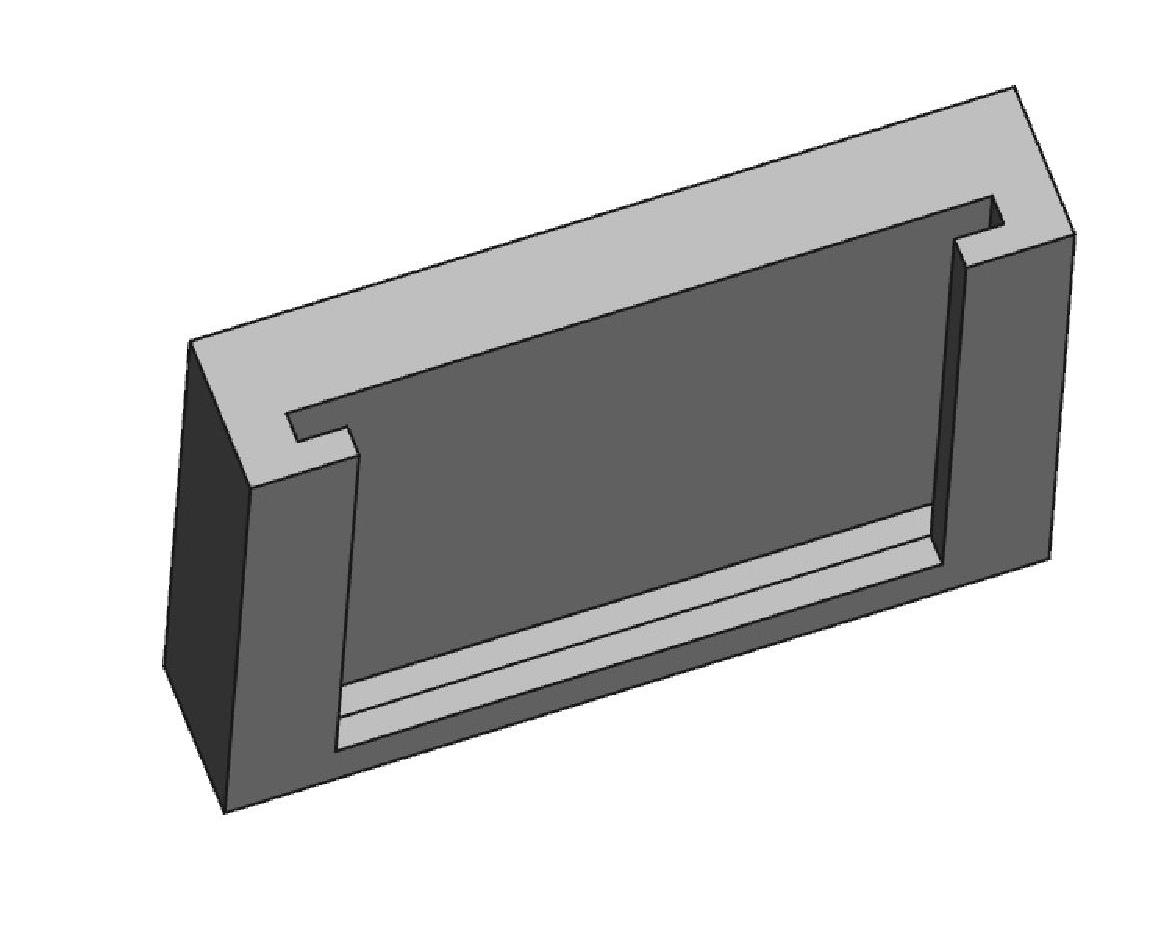
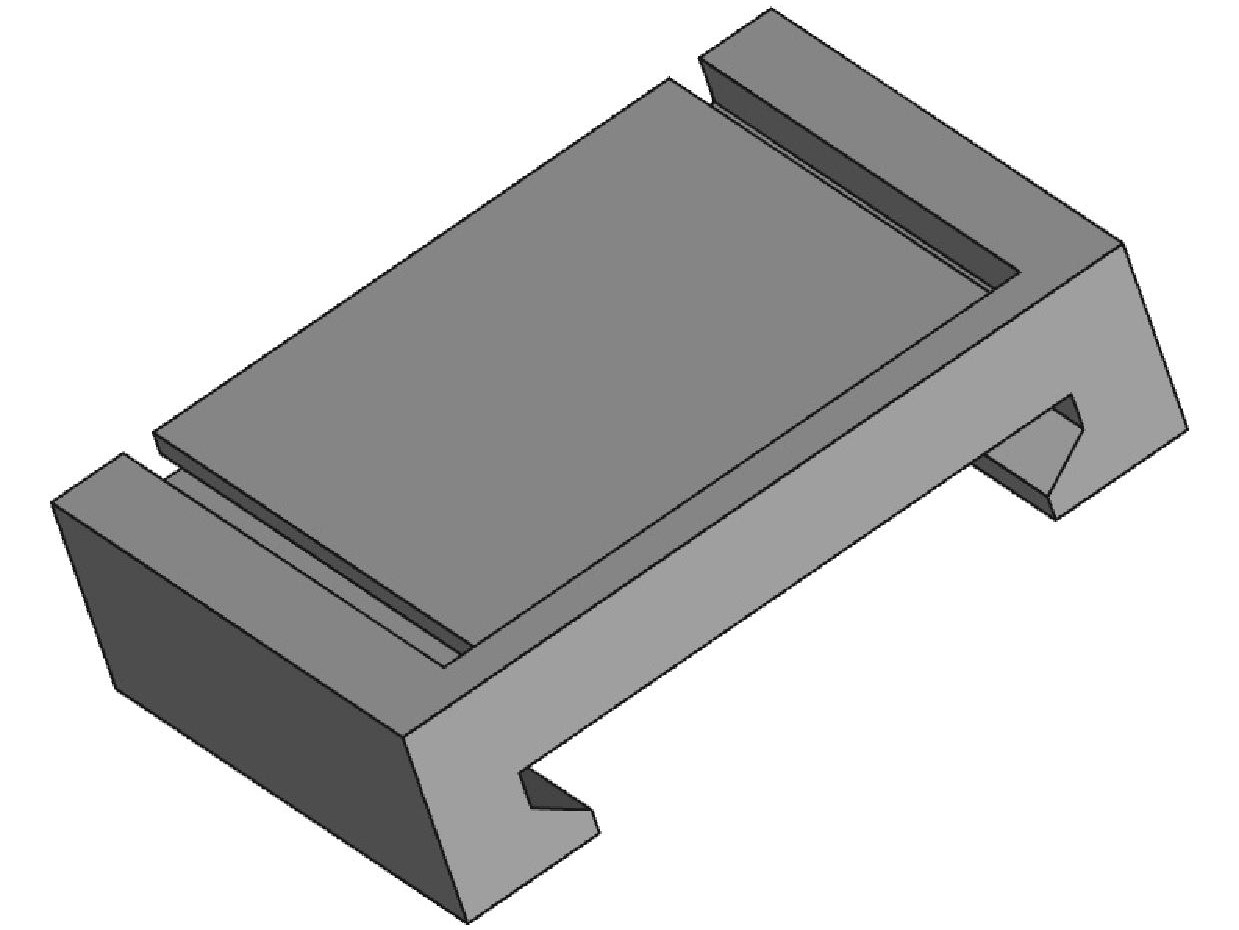
I discovered with my first design that the 3D printer has some trouble printing flat surfaces over a void. Although it can do it, a 90° corner is not perfectly square. This image is of my first attempt at making the part that mates with the shoe.
The loose tolerances on the shoe and the thin load-bearing parts of the repair adapter made me rethink the whole design. I originally did not consider making a better shoe because of the challenge I would have in making sure that the hole locations matched the as-built holes, with larger center mounting hole originally positioned by eyeball. Since I could easily reprint the shoe if my measurements were off, I decided that this was the way to go. This allowed me to make the shoe thicker with 45° walls. I added 2 mm of clearance between the shoe and the adapter body to account for corner tolerance.
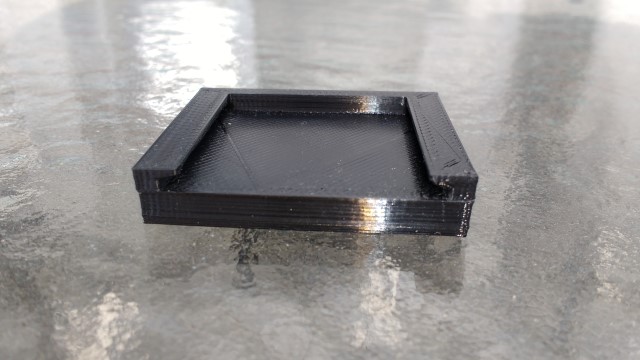
This image is the new shoe design. Notice that the holes have some residual plastic webbing and I had to use drill bit to ream them clean.
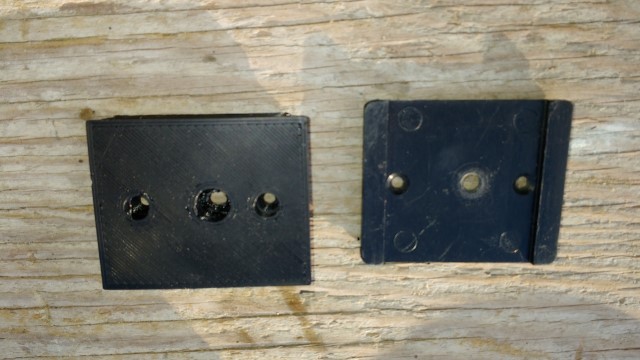
With the shoe mounted on the steel mounting bracket, the repair body did not slip onto it. It was pretty close and a little bit of filing to ensure that the surfaces were flat allowed the body to slip over the shoe.
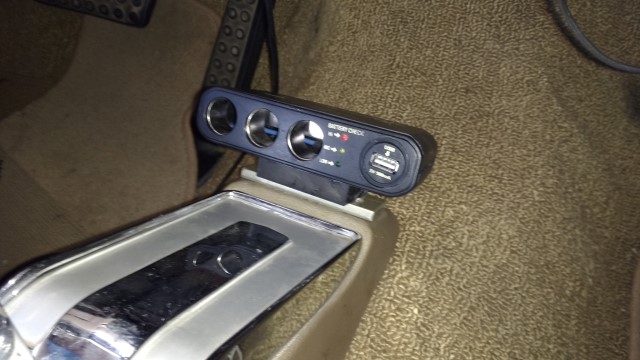
The repair body fit perfectly in the receptacle's remaining shoe receiver guide. However, when I tried to test fit the part broken piece of guide inserted in the body, I broke the other guide. I roughened up the receptacle body and then applied a liberal amount of epoxy to the mating surfaces. After giving the epoxy a chance to set overnight, I assembled it and the receptacle was again sturdily mounted to my console.